
 By
By 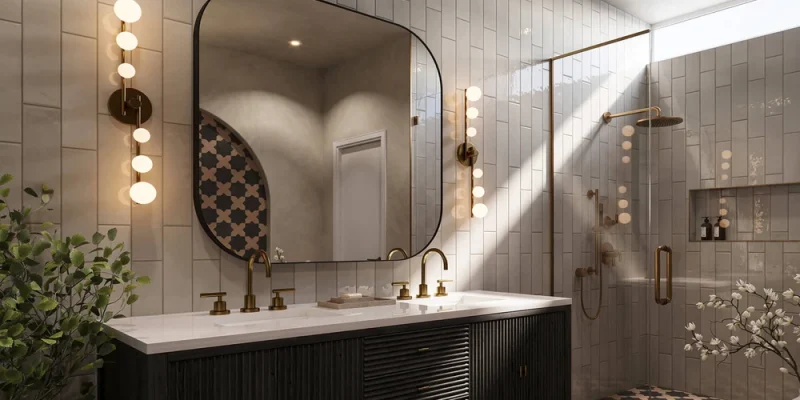
Good mirror lighting solves a problem most bathrooms get wrong. Ceiling fixtures cast shadows downward, hollowing out the eyes and hiding the jawline, which makes shaving and grooming a guessing game. The fix is to light the face from the front and sides, at roughly face height, with the right color and intensity. Here is how to plan and execute mirror lighting that actually works, whether you use side sconces, a backlit fixture, or an illuminated mirror.
Step 1: understand the goal before choosing fixtures
The purpose of mirror lighting is even, shadow-free illumination of the face. That single principle rules out overhead-only lighting and points toward light sources positioned beside or around the mirror at eye level. Everything that follows serves this goal.
Aim for light that comes from both sides, or evenly around the perimeter, so it fills the shadows that a top-down source creates. This is why theater dressing rooms ring the mirror with bulbs. They understood the principle a century ago, and it still holds.
Step 2: choose the fixture type
You have three main approaches. Side-mounted sconces flank the mirror and deliver excellent, balanced side lighting, the gold standard for grooming. A vanity bar mounted above works but casts some downward shadow unless the mirror is small. An illuminated mirror with built-in LED lighting solves the geometry automatically, lighting the face evenly from around its own edge.
Illuminated mirrors have become popular precisely because they remove the guesswork. The light is engineered into the right position by design. To compare the styles and features available, learn more about the mirror options and note which ones include integrated lighting and defogging.
Step 3: get the color temperature right
Color temperature, measured in kelvins, changes everything about how a face reads in the mirror. Too warm and yellow, and makeup applied there looks wrong in daylight. Too cold and blue, and the room feels clinical.
For a bathroom mirror, aim for a neutral range around 3000 to 4000 kelvin. This mimics natural daylight closely enough that grooming and makeup translate accurately once you step outside. Some illuminated mirrors offer adjustable color temperature, letting you warm the light for a relaxing evening and cool it for a sharp morning. Equally important is the color rendering index. A high CRI, ideally 90 or above, renders skin tones truthfully, which is the whole point of a grooming light.
Step 4: calculate the brightness you need
Brightness is measured in lumens, and bathrooms often end up underlit. For the vanity area specifically, you want substantial, even output at face level. A single dim fixture will not cut it.
Rather than one bright source that glares, distribute the lumens across two side fixtures or an evenly illuminated mirror perimeter. Even distribution matters more than raw brightness. A layered approach, combining mirror lighting with a separate general ceiling light, gives both task lighting for the face and ambient light for the room.
Step 5: plan the mounting height and position
Position is where many installations go wrong. Side sconces should sit at roughly eye level, commonly around 60 to 66 inches from the floor to the center of the fixture, and spaced far enough apart to flank the face rather than crowd it. Mounted too high, they recreate the very shadows you are trying to avoid.
For an illuminated mirror, center it over the sink at a comfortable viewing height, with the vertical center near eye level for the primary users. Measure and mark before drilling. A mirror hung even slightly off-center or off-level announces itself every time someone uses the room.
Step 6: handle the electrical work safely
This is the step that demands respect and, often, a professional. Bathrooms are wet locations governed by electrical code. Fixtures must be rated for damp or wet locations depending on their proximity to water, and circuits typically require ground-fault protection.
An illuminated mirror that plugs into an existing protected outlet can often be mounted by a competent DIYer. A hardwired fixture or mirror connected directly into the wall wiring usually requires a licensed electrician to meet code. Never improvise wiring in a bathroom. The combination of water and electricity is exactly where the rules are strictest for good reason.
Step 7: mount securely and test
Mirrors and fixtures are heavy, and drywall alone will not hold them. Anchor into wall studs where possible, or use appropriate heavy-duty anchors rated for the weight. A falling mirror over a hard tile floor is both a safety hazard and an expensive mess.
Once mounted and wired, test every function before considering the job done. Check the light output, any defogging element, adjustable color settings, and touch controls. Confirm there is no flicker, which can indicate a wiring or driver issue. Better to catch it now than after the tools are packed away.
Step 8: consider defogging and smart features
Once the core lighting is sorted, a few features are worth weighing before you finalize the choice, because retrofitting them later is far harder than including them now. The most valuable is defogging. A small heating element behind part of the mirror keeps a clear zone free of condensation after a hot shower, ending the daily ritual of wiping the glass by hand.
Adjustable color temperature is the next feature to consider. Being able to shift from a warm, relaxing light in the evening to a crisp, daylight-balanced light in the morning makes the mirror serve both moods. Some illuminated mirrors remember the last setting, others offer full dimming, which lets you fine-tune the intensity for the task at hand.
Touch controls, motion sensors, and integrated clocks add convenience but are genuinely optional. The trap is paying for features you will never use. Focus first on the fundamentals of even, accurate light, then add the extras that fit how you actually use the room.
If you choose a mirror with any of these powered features, revisit the electrical planning. A defogger and smart controls draw more power and may influence whether the unit plugs in or hardwires, which in turn affects whether you can install it yourself or need an electrician. Deciding on these features early keeps the wiring plan consistent from the start.
Bringing it together
Proper mirror lighting is not complicated once you understand the goal: even, accurate, shadow-free light at face height. Choose a fixture type that lights from the sides or perimeter, set the color temperature near daylight with high color rendering, provide enough evenly distributed brightness, position everything at the correct height, respect the electrical code, and mount it securely.
Get these steps right and the difference is immediate. Shaving becomes easier, makeup looks correct in daylight, and the whole bathroom feels brighter and more welcoming. It is one of the most satisfying upgrades in a renovation, and one that rewards a little planning far beyond its modest cost.








Comments