
 By
By 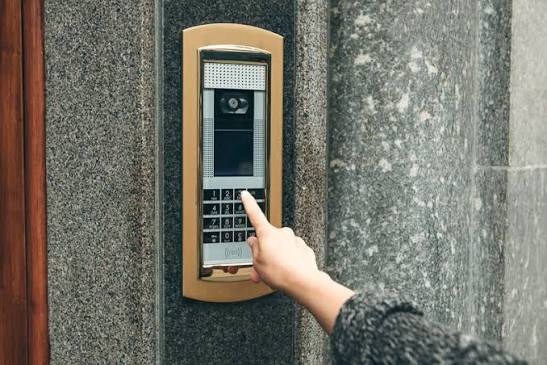
TL;DR: Upgrade the intercom while the wall is already open, not after drywall goes up — retrofitting new low-voltage wire into finished plaster costs more than the panel itself. If your renovation touches the entry vestibule, lobby wiring, or a unit’s interior wall, decide the intercom scope before the electrician finishes rough-in, and price the door hardware at the same time since both share the same opening.
What Is a Building Intercom System?
A building intercom system is the low-voltage hardware — entry panel, riser or in-unit wiring, and individual unit stations — that lets a resident hear or see who’s at the entry door and release the lock remotely. It’s a different animal from a single Wi-Fi video doorbell bolted to one apartment’s door: the wiring runs through the building’s risers or walls and ties multiple units to one entry point, which is exactly why it belongs on a renovation punch list rather than a “we’ll deal with it later” list.
Why It Matters Once Renovation Work Starts
The moment a contractor opens a wall for plumbing, electrical, or a layout change, the cost of also running or replacing intercom wire drops close to zero — it’s already exposed. Close that wall back up without touching the intercom line, and the same run later means cutting into finished plaster or drywall, patching, and repainting just to get a fish tape through. In an older walk-up, that wall might also be carrying a decades-old two-wire audio circuit shared with several other units, which limits what panel you can install without a fuller rewire.
This is also the point where scope creep is cheapest to absorb. Swapping a worn buzzer button for a video panel is a straightforward add when a low-voltage tech is already pulling cable for the renovation; it’s a separate mobilization, and a separate invoice, if you call someone back in six months. That’s usually the point where renovators start searching for intercom installation near me — the goal isn’t just a quote, it’s getting a technician to look at the existing wiring before the walls close, so the new panel matches what’s actually behind the plaster instead of what the spec sheet assumes.
How It Works
Audio, Video, and IP-Based Panels
Audio-only panels are still the cheapest and the most tolerant of old, degraded wiring — a resident hears a buzz, presses a button, done. Video panels add a camera and a screen or app tie-in, but they’re pickier about wire gauge and shielding, so an old two-conductor run that worked fine for audio may need replacing rather than reusing. IP-based systems from manufacturers like Comelit, Aiphone, or ButterflyMX route the video feed over the building’s network or cellular data instead of a dedicated wire back to each apartment, which is often the only realistic option in a building where running new conductors to every unit isn’t practical.
Where Door Hardware Fits In
An intercom is only as good as the lock it releases. If the entry door itself is being replaced or upgraded as part of the renovation — new frame, new electric strike, better weatherproofing — that’s a separate scope from the intercom wiring, and it’s worth arranging door access system installation in NYC alongside the intercom work rather than sequentially. A new electric strike and a new panel share the same release circuit, and testing them together on one visit avoids re-terminating and re-testing twice.
Coordinating the Work: Practical Steps
- Decide panel type before rough-in ends. Audio, video, or IP changes what needs to be pulled through the wall — deciding after drywall is up forces a retrofit.
- Ask what wire is already there. A technician can test an existing two-wire audio run before anyone commits to reusing or replacing it.
- Check board or landlord approval separately from your renovation permit. Many co-op and condo boards treat intercom changes as a building-system item even when your GC is already pulling a renovation permit.
- Sequence door hardware with the intercom, not after it. Both share the same opening and the same low-voltage release circuit.
- Confirm panel mounting height meets accessibility requirements if the building has any accessible units — this gets missed when the panel swap rides along with unrelated renovation work.
Building type changes the calculus, too. A pre-war walk-up in a neighborhood like Hell’s Kitchen often has plaster walls and no existing conduit, so surface-mounted raceway is more realistic than fishing wire through walls built before low-voltage wiring existed — worth confirming before the budget assumes a clean in-wall run.
Common Mistakes
- Closing the wall before deciding on the panel. The single most expensive mistake — it turns a five-minute wire pull into a demolition job.
- Assuming old wire will carry a video signal. Legacy two-conductor audio wiring frequently can’t, and testing it costs far less than discovering the failure after the panel is mounted.
- Skipping board approval because “it’s inside my unit.” The entry panel and riser wiring are building systems even when the visible endpoint is one apartment.
- Treating the door and the intercom as unrelated trades. They share a release circuit; sequencing them separately usually means paying for two site visits.
Intercom Panel Types Compared
| Type | How Residents Answer | Wiring Needs | Best Fit |
|---|---|---|---|
| Audio-only | Speaker + buzzer button | Tolerant of old 2-wire runs | Small buildings, budget-limited retrofits |
| Video (wired) | Screen or handset with camera feed | Needs shielded/higher-gauge wire | Mid-size buildings already replacing wiring |
| IP/Smart (app-based) | Smartphone app, no dedicated in-unit wire | Uses network/cellular, not per-unit wire | Buildings where pulling new wire to every unit isn’t practical |
FAQ
Can I keep the existing intercom wiring when upgrading to a video panel? Sometimes — it depends on the wire gauge and shielding. A technician can test the existing run before you commit; legacy two-conductor audio wire often can’t carry a clean video signal.
Does a co-op board need to approve an intercom swap during a renovation? Often yes, separately from your renovation permit, since the entry panel and riser wiring are shared building systems rather than a unit-only alteration.
Should the intercom and the entry door be handled on the same visit? They don’t have to be the same trade, but scheduling them together avoids re-terminating the door’s release wiring twice.
What’s the risk of closing the wall before deciding on a panel type? You lose the cheap window to run or replace wire — any change afterward means reopening finished plaster or drywall to fish a new line.
Is an IP-based intercom a good fit for an older building? Often, specifically because it avoids pulling new wire to every unit — it rides on the building’s existing network or cellular data instead.
Getting the Sequencing Right
The intercom upgrade succeeds or fails on timing, not brand. Decide the panel type while the wall is still open, test what wire is already there instead of assuming, and put the door hardware on the same schedule instead of a separate one. Get that sequencing wrong and you’re paying to reopen a wall you already closed.







Comments